Winter gives you time to set up a spring garden that runs smoothly from day one. Use the slow season to plan layouts, order and organize seeds and bulbs, and shore up soil and tools so planting feels effortless when warm weather arrives. Tackle simple winter tasks now—design the beds, start a seed list, refresh soil with compost, and sharpen tools—and you’ll save time and get better results next spring.
You can also keep gardening momentum indoors by starting herbs, learning seed-starting techniques, and caring for houseplants. Small projects like pruning dormant limbs, adding leaf mulch to beds, and feeding local wildlife will protect soil life and boost spring growth, so your first planting week becomes progress instead of catch-up.
Plan and Design Your Spring Garden
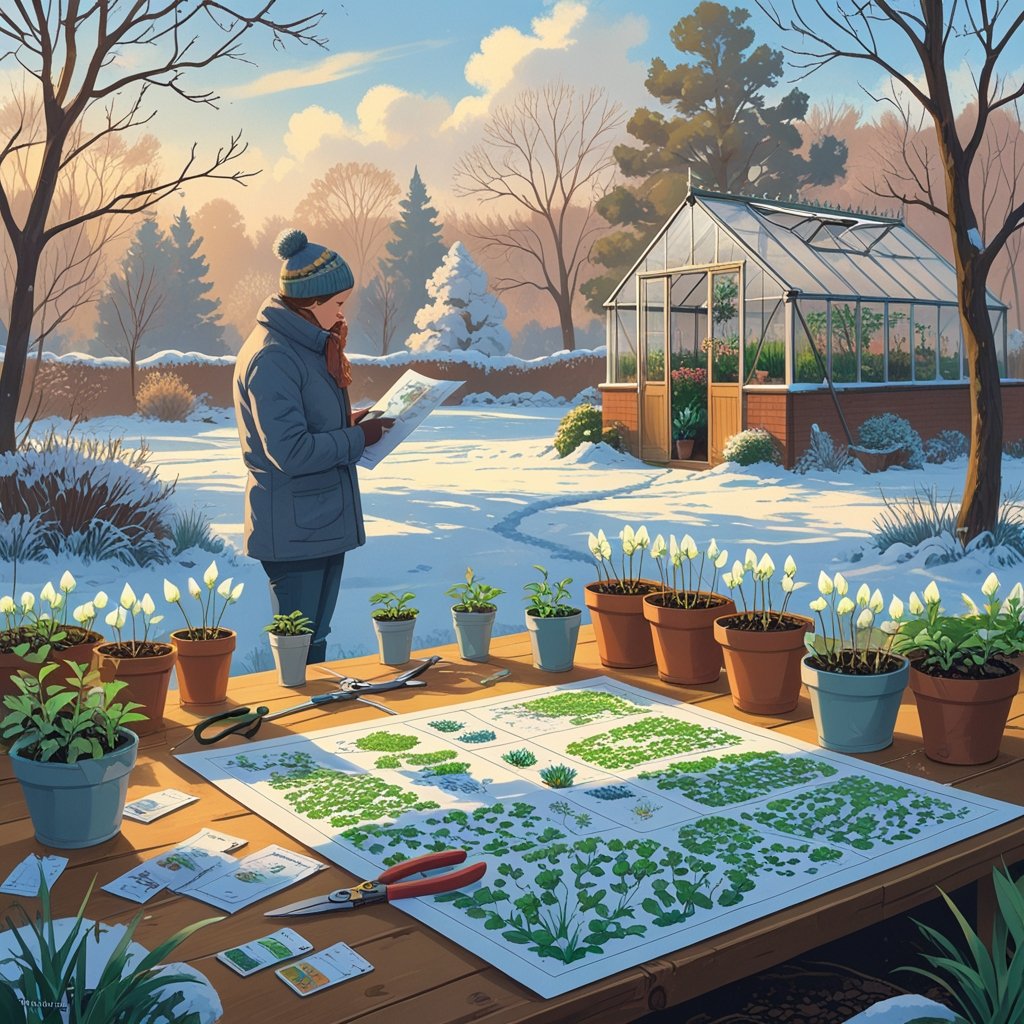
Start by deciding how much space you can dedicate, which crops you want first, and which areas get sun most of the day. Choose plants that match your soil, light, and the local last frost date so you avoid costly mistakes.
Map Out Garden Layout
Sketch a scaled map of your yard showing sun exposure, permanent features, and existing trees. Mark full-sun (6+ hours), partial shade (3–6 hours), and shade (<3 hours) zones; place heat-loving crops like tomatoes and peppers in full sun and leafy greens in cooler or partial-shade spots.
Plan bed sizes to match your tools and reach: 4-feet-wide beds suit walkways, 2–3 feet wide works for balcony or container setups. Include paths at least 18–24 inches wide for access and mulching.
Add permanent elements—irrigation lines, trellises, and a compost area—so you don’t move them midseason. Note areas for companion planting (e.g., basil near tomatoes) and a dedicated patch for native plants to support pollinators.
Set Key Dates and Calendar Reminders
Find your local last frost date from an authoritative source and log it as the keystone date for all planting windows. Work backward: schedule indoor seed starts, hardening off, and transplant dates relative to that frost date.
Create calendar reminders for seed ordering (8–12 weeks before start), soil testing and amendment application (4–6 weeks before planting), and cover-crop termination if you use one.
Use a digital calendar with alerts and color-coded entries: seed starts, transplanting, fertilizing, and major maintenance. Include buffer days for unexpected late frosts and set a reminder to check seed catalogs when new varieties arrive.
Research Seed Varieties and Plant Needs
Select varieties by days-to-maturity, disease resistance, and your length of growing season. Prioritize seeds with clear labels for maturity days and zone recommendations so you match crops to your last frost date and expected first frost.
Compare seed catalogs and local nurseries for region-adapted cultivars and native plant options. Look for native perennials and annuals to attract pollinators and reduce irrigation needs.
Record specific requirements—soil pH, spacing, depth, and companion-plant pairings—in a single table or spreadsheet to consult during planting. Order seeds early for popular varieties and keep a running wishlist for succession planting and backup options.
Order and Organize Seeds and Bulbs
Plan purchases, protect viability, and set up a system that makes spring planting fast and accurate. Prioritize ordering hard-to-find varieties early, store seeds and bulbs in cool, dry containers, and label everything so you never buy duplicates.
Order Seeds and Bulbs Early
Order seeds and bulbs several months before you need them to secure varieties like heirloom snapdragons or specialty onions that sell out quickly. Check seed catalog release dates and pre-order lists; popular suppliers often sell out of spring-blooming bulbs and limited-run flower seeds by late winter.
Place separate orders for bulbs (tulips, daffodils) and seeds (vegetables, annuals) because shipping and storage needs differ. For cold-stored bulbs, confirm grower handling and delivery timing so you can plant at the right chilling schedule. For seeds, buy only what you expect to use in 1–3 years to avoid long-term viability loss.
Keep order records in a simple spreadsheet: supplier, variety, quantity, order date, expected ship date. That prevents duplicate orders and helps you track germination tests later.
Create a Seed Storage System
Provide seeds and saved onion or vegetable seeds with a stable environment: cool (32–50°F/0–10°C), dry (<8–10% relative humidity), dark, and airtight. Use small airtight containers or vacuum-seal bags with silica gel packets for moisture control. Store containers in a drawer, cabinet, or dedicated seed fridge if you have many varieties.
Group containers by category: vegetables, herbs, annual flowers (snapdragons, cosmos), and spring-blooming bulbs in a separate box. Keep frequently used packets in an accessible “planting soon” bin. Avoid cardboard or loosely sealed plastic bags; they let moisture and pests in.
Label each container clearly on the lid and edge so you can read names without removing them. Periodically check desiccants and move older seeds forward for use.
Catalog and Label Seed Packets
Create a labeling standard that includes: common name, botanical name (optional), pack date, packet quantity, and recommended planting dates. Use waterproof labels or a label maker for clarity. Example: “Snapdragon ‘Black Prince’ — 01/2025 — 0.5g — Start Indoors Feb 15.”
Maintain a catalog—digital or paper—with a row per variety: supplier, lot number, germination rate (if provided), and last viability test result. Add a simple status column: “use soon,” “store long-term,” or “replace.” This prevents buying the same snapdragons or onions twice.
For saved seeds, write the harvest year and parent plant notes (disease resistance, flavor) to track performance. When you perform a germination test, record the percentage next to the entry so you know whether to sow more densely or order replacements.
Soil Preparation and Health
Winter work that targets structure, nutrients, and cover sets your garden up for an easier spring. Focus on testing, adding organic matter, and protecting beds with mulch so roots and soil biology recover and build through the cold months.
Test Your Soil
Get a soil test kit or submit a sample to your local extension service now, while beds are accessible. Test for pH, phosphorus (P), potassium (K), and organic matter; these results tell you whether lime, sulfur, or specific fertilizers are needed before spring planting.
Collect 6–10 small cores from the top 4–6 inches across a representative area and mix them in a clean bucket. Label samples by bed or zone. Follow the lab’s instructions for drying, bagging, and sending; municipal labs often include interpretation and amendment rates.
Record results in a notebook or digital file so you can track changes year to year. Adjustments you make in winter—lime to raise pH, sulfur to lower it, or targeted P/K—have time to react with the soil before seeds go in.
Amend with Organic Matter
Add 1–3 inches of finished compost or well-rotted organic compost across beds; work it lightly into the top 2–4 inches if soil is dry and friable. Compost improves structure, water retention, and microbial activity without the risk of burning roots.
If you have a compost pile, compost bin, or worm bin, use finished material; avoid adding fresh, high-carbon leaves or wood chips that will temporarily tie up nitrogen. For large areas, spread compost and then plant a cover crop like crimson clover or winter rye to protect soil and build biomass.
Side-dress fruit trees and perennial beds with a 2-inch compost topdressing near the drip line, keeping compost off crowns. If your soil test shows low organic matter, repeat annual topdressings and consider mulched pathways to reduce compaction.
Mulching for Winter Protection
Apply a 3–4 inch layer of shredded leaves, straw, or well-composted mulch over vegetable beds and around perennials to prevent frost heaving and conserve microbial habitat. Use whole leaves where possible to create leaf mold over the season; it becomes an excellent soil conditioner by spring.
Keep mulch a few inches away from stems and crowns to avoid rot and rodent damage. In cold regions, combine mulch with a cover crop: sow winter rye or oats, then top with mulch after growth slows to protect roots and add organic matter when you turn them in come spring.
Mulch also suppresses winter weeds and maintains moisture. Remove or thin heavy mulch in early spring as soils warm, or leave it in place and fork it in when you prepare beds for planting.
Tool and Equipment Maintenance
Keep tools clean, sharp, and stored so they work safely and reliably when spring arrives. Focus on removing soil and rust, sharpening cutting edges, replacing worn handles, and winterizing larger equipment and greenhouse systems.
Clean and Sharpen Tools
Remove soil and sap immediately; use a stiff wire brush or putty knife for dried mud on metal heads. Wash tools in warm soapy water, dry thoroughly, then wipe metal parts with a light coat of oil (motor oil or vegetable oil) to prevent rust.
Sharpen blades on pruners, shears, hoes, and shovel edges with a file or sharpening stone. Hold the bevel angle steady and make smooth, even strokes; finish with a fine stone for a keen edge. For lawnmower blades, remove, balance, and sharpen on a bench grinder or have a shop do it.
Sanitize cutting tools after use on diseased plants. Wipe blades with 70% isopropyl alcohol or a 10% bleach solution, then rinse and oil. Store hand tools on a wall rack or in a dry box to keep handles off the ground and prevent rot.
Inspect and Repair Garden Structures
Walk the garden perimeter and inspect raised beds, trellises, fences, and cold frames for loose joints, rot, and insect damage. Tighten screws, replace broken slats, and re-stake leaning posts to prevent winter collapse.
Sand and reseal wooden handles and wood structures with boiled linseed oil or exterior wood sealer to reduce moisture uptake. Replace any wooden parts that show deep rot or cracks; split handles are a safety hazard and should be swapped before use.
Check hardware: hinges, latches, and fasteners should move freely and be free of rust. Lubricate metal joints with a silicone spray or light oil. For cold frames, replace torn plastic or cracked glass and ensure seals and weatherstripping keep heat in.
Prepare Greenhouse and Cold Frames
Clean greenhouse glazing and frames inside and out to maximize winter light. Remove algae and dirt with a mild detergent, rinse, then inspect seals, gaskets, and any broken panes. Replace damaged glazing promptly to retain heat.
Service heaters, thermostats, and ventilation systems now. Test automatic vents and backup heaters, replace fuel or clean filters, and store spare bulbs and fuses in a labeled kit. Arrange thermal mass (water barrels or stone) and add insulating row cover or bubble wrap to reduce heat loss.
For cold frames, repair hinges and replace clear covers as needed. Ensure lids close tightly and add a simple latch or weight to prevent wind lift. Position cold frames to catch low winter sun and clear snow from tops to allow light penetration.
Winter Gardening Activities Indoors
Prepare targeted, high-impact projects that keep your hands busy and give the spring garden a head start: start seeds indoors for early transplants, maintain a small herb station for fresh cooking, and grow microgreens or houseplants to boost year-round greenery and nutrition.
Start Seeds Indoors
Starting seeds indoors gives you control over germination timing and stronger transplants for cool-season crops like arugula, kale, and brassicas such as Brussels sprouts. Use seed-starting trays or individual cells filled with a sterile seed mix; label each row with variety and sowing date. Keep soil moist but not waterlogged and cover trays with a clear dome until seedlings appear.
Place trays under grow lights 2–4 inches above tops, on a timer set for 14–16 hours daily. Use a gentle fan for air circulation to strengthen stems. Harden off seedlings by exposing them to outdoor conditions for increasing increments over 7–10 days before planting outside. Track germination and transplant dates in a simple journal to refine timing next season.
Grow an Indoor Herb Garden
An indoor herb garden supplies fresh thyme, rosemary, sage and other culinary herbs through winter and preps cuttings for spring propagation. Choose pots with drainage and use a well-draining potting mix; plant perennial herbs in slightly larger containers to accommodate root growth. Place the garden where it gets 6+ hours of bright light or supplement with a full-spectrum grow light.
Water when the top 1 inch of soil dries and avoid overwatering rosemary and sage, which prefer slightly drier conditions. Prune regularly to encourage bushier growth and take 3–4 inch cuttings to root in water or a small pot—this creates ready-to-plant starts for spring. Rotate pots weekly for even light exposure and label each herb with variety and harvest notes.
Cultivate Microgreens and Houseplants
Microgreens give fast, nutritious harvests (10–21 days) and require minimal space—use shallow trays, a seed-friendly mix, and seeds such as kale or arugula sown thickly. Keep trays under lights set 12–16 hours daily and mist to maintain surface moisture until cotyledons open. Harvest with scissors just above the soil line when true leaves appear.
For houseplants, prioritize species that tolerate lower light and indoor heat, and use a regular schedule: check humidity, dust leaves, and water based on plant needs. Rotate plants for even growth and consider rooting houseplant cuttings to expand your collection or replace outdoor starts lost in spring. Both microgreens and houseplants improve indoor air and keep your propagation skills sharp for spring.
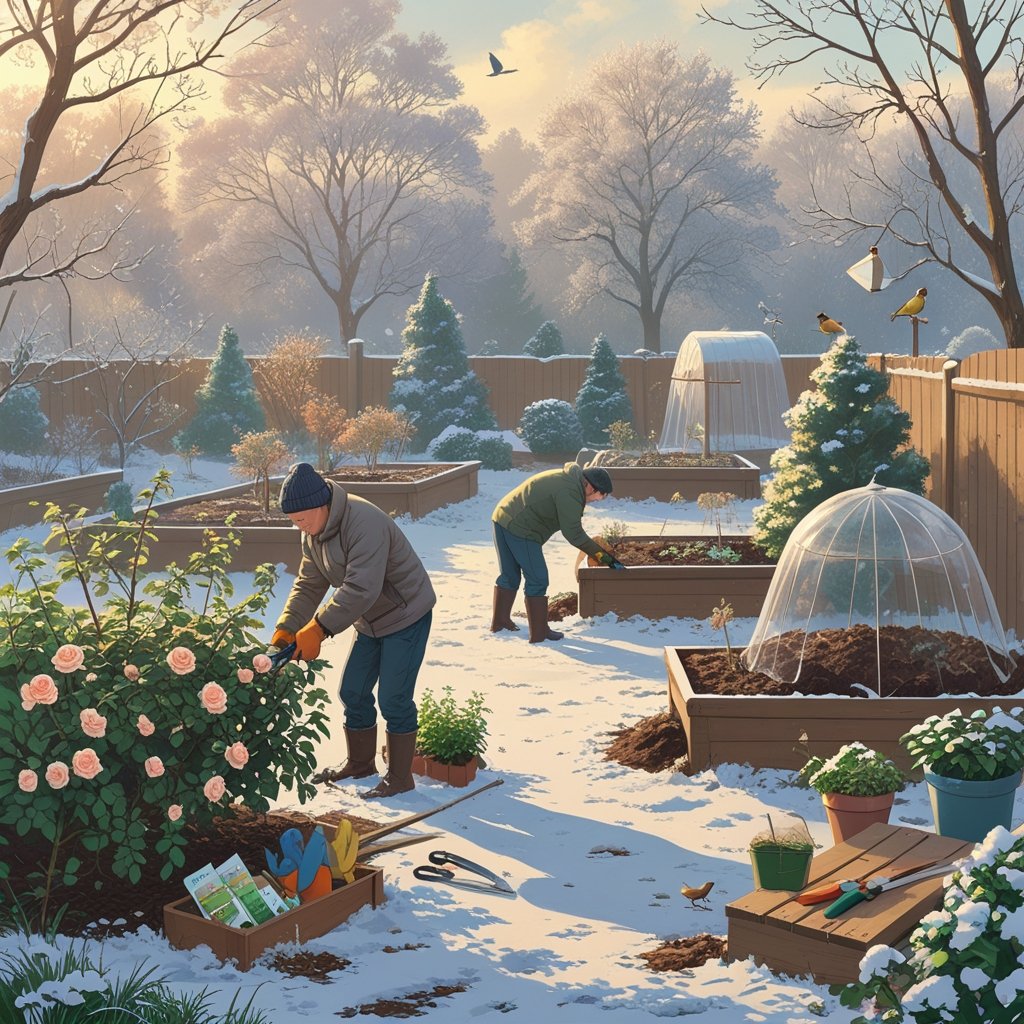
Pruning, Cleanup, and Wildlife Care
Focus on removing dead wood, clearing debris that harbors pests, and leaving or providing winter habitat and food for pollinators and beneficial insects. Time pruning for dormancy, tidy beds without stripping all seed heads, and add targeted wildlife supports like bee hotels and suet.
Prune Trees and Shrubs
Prune deciduous trees and most shrubs while they’re fully dormant to improve structure and reduce winter storm damage. Remove crossing branches, suckers, and any dead or diseased wood; cut branches back to a healthy lateral bud or main stem. For roses, wait until late winter or early spring in colder zones and remove canes that are dead, thin, or below the graft union.
Use clean, sharp tools and disinfect pruners between cuts when you see canker or fungal symptoms to reduce spread of disease. Make pruning cuts at a slight angle, about 1/4 inch above a bud that faces the outside of the plant. Don’t heavy-prune spring-flowering shrubs now — prune them right after they bloom instead.
Clean Up Debris and Beds
Remove diseased foliage and fallen fruit from beds to cut overwintering pest and disease reservoirs. Rake leaves from lawns and vegetable plots; compost only healthy material or hot-compost diseased clippings separately. Leave some intact seed heads and dried stalks in ornamental beds to provide winter food and shelter for birds and beneficial insects.
Apply a 2–3 inch layer of mulch after cleanup to protect bulb plantings and perennials, keeping mulch a few inches away from crowns to prevent rot. Lift and store tender bulbs before hard freezes, label varieties, and keep them in a cool, dry place. Inspect irrigation lines and tidy containers to prevent standing water that attracts pests.
Support Pollinators and Beneficial Wildlife
Provide winter resources: hang suet cakes for insect-eating birds and install bee hotels in a sunny, sheltered spot facing southeast. Leave patches of native grasses, hollow stems, and seed heads through winter; they shelter overwintering bees and provide seeds for birds. Clean and repair existing bee hotels annually — replace soiled tubes and sterilize frames to avoid disease build-up.
Plant early spring-blooming bulbs and native wildflowers now where possible so pollinators find nectar as soon as they emerge. Avoid broad-spectrum insecticides late in the season; use targeted control only for active pest outbreaks after proper identification.